Sunday, September 25, 2011

...You need what for this show?

On occasion, we enter a prop project knowing it will likely require more than one take. This spring, UF's production of The Grapes of Wrath required a life-size dummy. (I'm trying not to spoil the storyline.)


The shop began with Dummy 1.0. Ann and I tagged teamed this one. We knew the actors would discover the requirements of this prop as they started rehearsing with it. So we found an empty suit in the shop. (No worries, we have more around. I would recommend checking with the TD before you take safety equipment!) We stuffed the suit with styrofoam and rubber mulch. And a bit of tape for shaping.


We 'dressed' the dummy with some clothes from the prop room. 
(Though Twinkie pants are not period, Twinkies were a hit in the Great Depression.)

And so Dummy 1.0 was released to rehearsal. The first realization: the dummy needed to be unloaded from the back of the family truck. There were already 7 people in the back for this scene, so our dummy was going to need to sit and blend in. 

I started Dummy 2.0 Know he needed to be a bit closer to a real boy. I channeled my inner Gepetto.


Dummy 2.0 had hinges joints at the knees and hips. He could sit and be carried comfortably.


The wooden form was covered in fabric from packing blankets. Shoes were also attached. The dummy was wrapped in a quilt for the show, but we had to keep the Twinkie pants.

Dummy 2.0 was not kept after the production. He was scaring people as they walked into prop storage.

Sunday, September 18, 2011

Stumped

Once upon a time, Frog and Toad lived at The Green Room Theatre. And I decided they each deserved a chair with a bit of style. So I made a set of tree seats.

1. Modify an existing chair by adding a wood-framed base. Attach chicken wire.


2. Dip muslin in diluted carpenter's glue. The bark texture was created by wringing out the fabric and stapling before smoothing out the crinkles. (The smooth edge on top was achieved by stapling on the back side, then folding the piece over.) Thinner strips were used for the back of the chair.

3. Paint chair, accenting the highlights and shadows with different shades.

4. Find a 6'3" Frog. Toad will probably follow shortly.


Enjoy!


Sunday, September 11, 2011

There Will Be (Stage) Blood

Sometimes we like to pretend people on stage are bleeding. Here's a few ideas to get your creativity flowing.

The biggest advice I can offer for stage blood: START NOW. No, really. There's a lot to consider. How much, what type, what costumes/scenic elements/props are involved, what sort of delivery system will be used, how will the actors react to exposure, what the blood will look like under the lights, etc. Don't wait until tech weekend.

For a small amount that doesn't need to be live (like a cut finger in The Clean House) I use a thick application of nail polish on a white rag.

My first experiences with stage blood/makeup came when I assisted with drunk driving reenactments. Those actors were asked to wear old clothes, took their positions in the mangled cars (prosthetic wounds in place), and were promptly drenched in 5 gallons worth of corn syrup and food coloring. Yes, really.

But that's a one-time performance. When you need costumes to be pristine for the next performance, you want a washable recipe.

If you have a healthy budget, Reel Blood is a fantastic option. But it's pricey.

While working on In The Blood I used ERA detergent and Wilton Icing Coloring. (ERA is a bit more difficult to find, but far less abrasive than Tide. The actors will be grateful!) The sample batch was tested on the fabric and washed out well. (I worked on a production of Sweeney Todd that used grapefruit dish soap for the base. Creme de Coco used chocolate syrup. Whatever you choose coordinate with costumes and lights.)

We went through half a dozen delivery methods for the blood packs on that show. My favorite (though not used) was filling small zip-lock bags, chilling the mix, then using a Seal-A-Meal to create a clean seam. The packs broke under hand pressure but not in the actor's pockets prior.


No one gave a second glance to my project in the freezer.

In summary, time and communication are the essentials of this project. Have fun!

Sunday, September 4, 2011

I feel like Dirt

The blog is back! And I feel awful about the long break between posts. Like dirt, actually. So what better project to kick-start the adventures with than fake dirt?

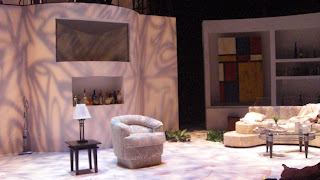
To accommodate the fake dirt needs of The Clean House I harvested clean sawdust. Roughly a 5-gallon bucket of it. (Clean sawdust! Sweeping the floor for collection could have resulted in staples/brads in the finished project.) Umber paint was gradually added until the consistency was chunky but saturated. The mix was thinly spread on paper on the loading dock and flipped occasionally until the 'dirt' was completely dry.

I discovered all the materials I needed for the project in the prop room.


1. Coat the base of the plants with Great Stuff. Allow foam to dry.


2. Glue the 'dirt' and 'roots' to the foam. I used hot glue because the plants were going to be taking a nightly beating.


3.  I lightly sprayed the roots with Super 77 (A 3M spray ), then dusted the entire surface with dirt.


4. Hurl the plants across the stage! Feel better about life.

Well, that's all for this week. Look for another update Sunday night!